GitHub - eli64s/readme-ai: README file generator, powered by AI.
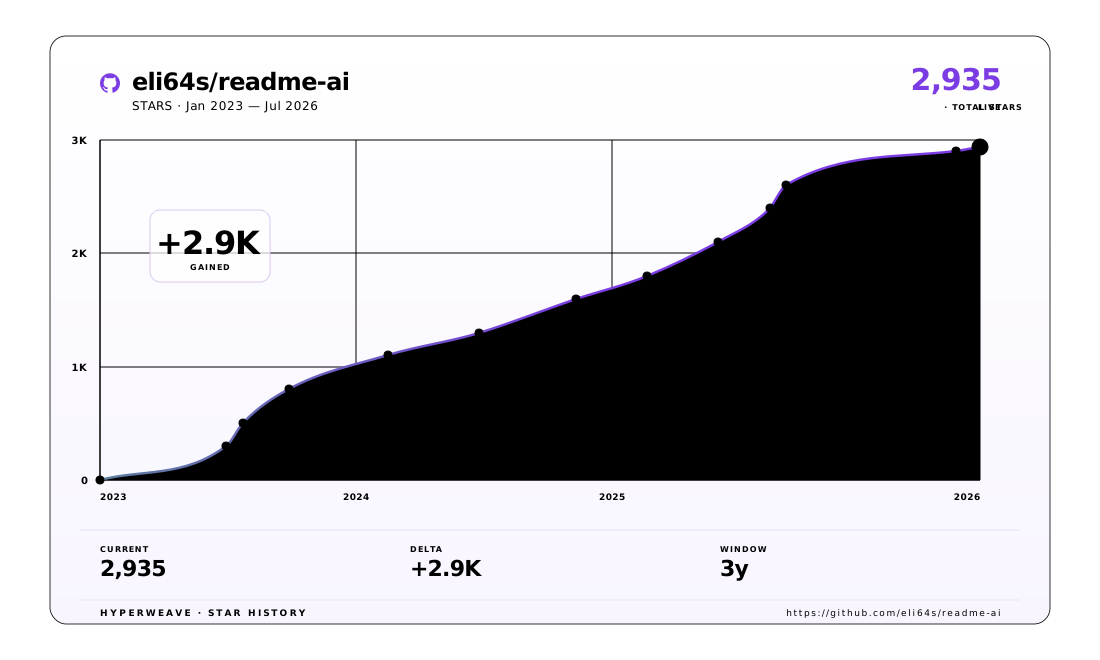
Designed for simplicity, customization, and developer productivity. The metrics above are rendered with HyperWeave — an experimental SVG artifact layer for agents. Explore → Quick Links - Intro - Demo - Features - Quickstart - Configuration - Example Gallery
社区作者 · zZz
它解决什么问题
Designed for simplicity, customization, and developer productivity.
The metrics above are rendered with HyperWeave — an experimental SVG artifact layer for agents. Explore →
Quick Links
- Intro
- Demo
- Features
- Quickstart
- Configuration
- Example Gallery
- Contributing Guidelines
Important Explore the Official Documentation for a complete list of features, customization options, and examples.
Introduction
ReadmeAI is a developer tool that automatically generates README files using a robust repository processing engine and advanced language models. Simply provide a URL or path to your codebase, and a well-structured and detailed README will be generated.
Why Use ReadmeAI?
This project aims to streamline the process of creating and maintaining documentation across all technical disciplines and experience levels. The core principles include:
- 🔵 Automate: Generate detailed and structured README files with a single command.
- ⚫️ Customize: Select from a variety of templates, styles, badges, and much more.
- 🟣 Flexible: Switch between OpenAI , Ollama , Anthropic , and Gemini anytime.
- 🟠 Language Agnostic: Compatible with a wide range of languages and frameworks.
- 🟡 Best Practices: Ensure clean and consistent documentation across all projects.
- 🟢 Smart Filtering: Intelligent file analysis with customizable .readmeaiignore patterns.
- ⛔️ Offline Mode: Create README files offline, without using a LLM API service.
Demo
Run from your terminal:
cli-demo.mov
Features
Customize Your README
Let's begin by exploring various customization options and styles supported by ReadmeAI:
Header Styles
CLI Command:
$ readmeai --repository https://github.com/eli64s/readme-ai-streamlit \ --logo custom \ --badge-color FF4B4B \ --badge-style flat-square \ --header-style classic
CLI Command:
$ readmeai --repository https://github.com/olliefr/docker-gs-ping \ --badge-color 00ADD8 \ --badge-style for-the-badge \ --header-style modern \ --navigation-style roman
CLI Command:
$ readmeai --repository https://github.com/rumaan/file.io-Android-Client \ --badge-style plastic \ --badge-color blueviolet \ --logo PURPLE \ --header-style COMPACT \ --navigation-style NUMBER \ --emojis solar
Banner Styles
CLI Command:
$ readmeai --repository https://github.com/emcf/thepipe \ --badge-style flat-square \ --badge-color 8a2be2 \ --header-style console \ --navigation-style accordion \ --emojis water
CLI Command:
$ readmeai --repository https://github.com/FerrariDG/async-ml-inference \ --badge-style plastic \ --badge-color 43a047 \ --header-style BANNER
And More!
CLI Command:
$ readmeai --repository 'https://github.com/eli64sreadme-ai-streamlit' \ --badge-style FLAT-SQUARE \ --badge-color E92063 \ --header-style COMPACT \ --navigation-style ACCORDION \ --emojis RAINBOW \ --logo ICE
CLI Command:
$ readmeai --repository https://github.com/jwills/buenavista \ --align LEFT \ --badge-style FLAT-SQUARE \ --logo CUSTOM
Generated Sections & Content
꩜ Expand to view more!
Project Introduction
- This section captures your project's essence and value proposition.
- The prompt template used to generate this section can be viewed here .
Features Table
- Detailed feature breakdown and technical capabilities.
- The prompt template used to generate this section can be viewed here .
Project Structure
- Visual representation of your project's directory structure.
- The tree is generated using pure Python and embedded in a code block.
Project Index
- Summarizes key modules of the project, which are also used as context for downstream prompts.toml .
Getting Started Guides
- Dependencies and system requirements are extracted from the codebase during preprocessing.
- The parsers handle most of the heavy lifting here.
Installation, Usage, & Testing
- Setup instructions and usage guides are automatically created based on data extracted from the codebase.
Community & Support
- Development roadmap, contribution guidelines, license information, and community resources.
- A return button is also included for easy navigation.
Contribution Guides
- Instructions for contributing to the project, including resource links and a basic contribution guide.
- Graph of contributors is also included for open-source projects.
Getting Started
Prerequisites
ReadmeAI requires Python 3.10 or higher, and one of the following installation methods:
Requirement Details
Python ≥3.10Core runtime
Installation Method (choose one)
pipDefault Python package manager
Isolated environment installer
- pipx
uvHigh-performance package manager
dockerContainerized environment
Supported Repository Platforms
To generate a README file, provide the source repository. ReadmeAI supports these platforms:
Platform Details
File System Local repository access
GitHub Industry-standard hosting
GitLab Full DevOps integration
Bitbucket Atlassian ecosystem
Supported LLM API Services
ReadmeAI is model agnostic, with support for the following LLM API services:
Provider Best For Details
OpenAI General use Industry-leading models
Anthropic Advanced tasks Claude language models
Google Gemini Multimodal AI Latest Google technology
Ollama Open source No API key needed
Offline Mode Local operation No internet required
Installation
ReadmeAI is available on PyPI as readmeai and can be installed as follows:
PipInstall with pip (recommended for most users):
❯ pip install -U readmeai
Pipx
With pipx , readmeai will be installed in an isolated environment:
❯ pipx install readmeai
UvThe fastest way to install readmeai is with uv :
❯ uv tool install readmeai
DockerTo run readmeai in a containerized environment, pull the latest image from [Docker Hub][dockerhub-link]:
❯ docker pull zeroxeli/readme-ai:latest
From source
Click to build readmeai from source
- Clone the repository:
❯ git clone https://github.com/eli64s/readme-ai
- Navigate to the project directory:
❯ cd readme-ai
- Install dependencies:
❯ pip install -r setup/requirements.txt
Alternatively, use the [setup script][setup-script] to install dependencies:
Bash- Run the setup script:
❯ bash setup/setup.sh
Or, use poetry to build and install project dependencies:
Poetry
- Install dependencies with poetry:
❯ poetry install
Additional Optional Dependencies
Important To use the Anthropic and Google Gemini clients, extra dependencies are required. Install the package with the following extras:
- Anthropic:
❯ pip install " readmeai[anthropic] "
- Google Gemini:
❯ pip install " readmeai[google-generativeai] "
- Install Multiple Clients:
❯ pip install " readmeai[anthropic,google-generativeai] "
Usage
Set your API keyWhen running readmeai with a third-party service, you must provide a valid API key. For example, the OpenAI client is set as follows:
❯ export OPENAI_API_KEY= < your_api_key >
For Windows users:
❯ set OPENAI_API_KEY= < your_api_key >
Click to view environment variables for - Ollama , Anthropic , Google Gemini
Ollama
Refer to the Ollama documentation for more information on setting up the Ollama server.
To start, follow these steps:
- Pull your model of choice from the Ollama repository:
❯ ollama pull llama3.2:latest
- Start the Ollama server and set the OLLAMA_HOST environment variable:
❯ export OLLAMA_HOST=127.0.0.1 && ollama serve
Anthropic
-
Export your Anthropic API key:❯ export ANTHROPIC_API_KEY= < your_api_key >
Google Gemini
-
Export your Google Gemini API key:❯ export GOOGLE_API_KEY= < your_api_key
Using the CLI
Running with a LLM API service
Below is the minimal command required to run readmeai using the OpenAI client:
❯ readmeai --api openai -o readmeai-openai.md -r https://github.com/eli64s/readme-ai
Important The default model set is gpt-3.5-turbo , offering the best balance between cost and performance.When using any model from the gpt-4 series and up, please monitor your costs and usage to avoid unexpected charges.
ReadmeAI can easily switch between API providers and models. We can run the same command as above with the Anthropic client:
❯ readmeai --api anthropic -m claude-3-5-sonnet-20240620 -o readmeai-anthropic.md -r https://github.com/eli64s/readme-ai
And finally, with the Google Gemini client:
❯ readmeai --api gemini -m gemini-1.5-flash -o readmeai-gemini.md -r https://github.com/eli64s/readme-ai
Running with local models
We can also run readmeai with free and open-source locally hosted models using the Ollama:
❯ readmeai --api ollama --model llama3.2 -r https://github.com/eli64s/readme-ai
Running on a local codebase
To generate a README file from a local codebase, simply provide the full path to the project:
❯ readmeai --repository /users/username/projects/myproject --api openai
Adding more customization options:
❯ readmeai --repository https://github.com/eli64s/readme-ai \ --output readmeai.md \ --api openai \ --model gpt-4 \ --badge-color A931EC \ --badge-style flat-square \ --header-style compact \ --navigation-style fold \ --temperature 0.9 \ --tree-depth 2 --logo LLM \ --emojis solar
Running in offline mode
ReadmeAI supports offline mode , allowing you to generate README files without using a LLM API service.
❯ readmeai --api offline -o readmeai-offline.md -r https://github.com/eli64s/readme-ai
DockerRun the readmeai CLI in a Docker container:
❯ docker run -it --rm \ -e OPENAI_API_KEY= $OPENAI_API_KEY \ -v " $( pwd ) " :/app zeroxeli/readme-ai:latest \ --repository https://github.com/eli64s/readme-ai \ --api openai
Streamlit
Try readme-ai directly in your browser on Streamlit Cloud, no installation required.
See the readme-ai-streamlit repository on GitHub for more details about the application.
Warning The readme-ai Streamlit web app may not always be up-to-date with the latest features. Please use the command-line interface (CLI) for the most recent functionality.
From source
Click to run readmeai from source
BashIf you installed the project from source with the bash script, run the following command:
- Activate the virtual environment:
❯ conda activate readmeai
- Run the CLI:
❯ python3 -m readmeai.cli.main -r https://github.com/eli64s/readme-ai
Poetry
- Activate the virtual environment:
❯ poetry shell
- Run the CLI:
❯ poetry run python3 -m readmeai.cli.main -r https://github.com/eli64s/readme-ai
Testing
The pytest and nox frameworks are used for development and testing.
Install the dependencies with uv:
❯ uv pip install --dev --group test --all-extras
Run the unit test suite using Pytest:
❯ make test
Using nox, test the app against Python versions 3.10 , 3.11 , 3.12 , and 3.13 :
❯ make test-nox
Tip Nox is an automation tool for testing applications in multiple environments. This helps ensure your project is compatible with across Python versions and environments.
Configuration
Customize your README generation with a variety of options and style settings supported such as:
Option Description Default
--align Text alignment in header center
--api LLM API service provider offline
--badge-color Badge color name or hex code 0080ff
--badge-style Badge icon style type flat
--header-style Header template style classic
--navigation-style Table of contents style bullet
--emojis Emoji theme packs prefixed to section titles None
--logo Project logo image blue
--logo-size Logo image size 30%
--model Specific LLM model to use gpt-3.5-turbo
--output Output filename readme-ai.md
--repository Repository URL or local directory path None
--temperature Creativity level for content generation 0.1
--tree-max-depth Maximum depth of the directory tree structure 2
Run the following command to view all available options:
❯ readmeai --help
Visit the Official Documentation for a complete guide on configuring and customizing README files.
Example Gallery
This gallery showcases a diverse collection of README examples generated across various programming languages, frameworks, and project types.
Tech Repository README Project Description
PythonREADME-Python.md readmeai ReadmeAI's core project
Apache Flink README-Flink.md pyflink-poc PyFlink proof of concept
Streamlit README-Streamlit.md readmeai-streamlit Web application interface
Vercel & NPM README-Vercel.md github-readme-quotes Deployment showcase
Go & DockerREADME-DockerGo.md docker-gs-ping Containerized Golang app
FastAPI & Redis README-FastAPI.md async-ml-inference ML inference service
Java README-Java.md minimal-todo Minimalist To-Do app
PostgreSQL & DuckDB README-PostgreSQL.md buenavista Database proxy server
Kotlin README-Kotlin.md android-client Mobile client application
Offline Mode README-Offline.md litellm Offline functionality demo
Community Contribution
Share Your README Files
We invite developers to share their generated README files in our Show & Tell discussion category. Your contributions help:
- Showcase diverse documentation styles
- Provide real-world examples
- Help improve the ReadmeAI tool
Find additional README examples in our examples directory on GitHub.
Roadmap
- Release readmeai 1.0.0 with robust documentation creation and maintenance capabilities.
- Extend template support for various project types and programming languages .
- Develop Vscode Extension to generate README files directly in the editor.
- Develop GitHub Actions to automate documentation updates.
- Add badge packs to provide additional badge styles and options.
- Code coverage, CI/CD status, project version, and more.
Contributing
Contributions are welcome! Please read the Contributing Guide to get started.
- 💡 Contributing Guide : Learn about our contribution process and coding standards.
- 🐛 Report an Issue : Found a bug? Let us know!
- 💬 Start a Discussion : Have ideas or suggestions? We'd love to hear from you.
Acknowledgments
A big shoutout to the projects below for their awesome work and open-source contributions:
🎗 License
Copyright © 2023-2025 readme-ai .
Released under the MIT license.
— 本文由 AI 根据公开来源辅助整理,命令、版本与许可证请在使用前到原始页面复核。
安装 / 开始使用
Getting Started Guides
Installation, Usage, & Testing
Community & Support
Contribution Guides
Getting Started Prerequisites ReadmeAI requires Python 3.10 or higher, and one of the following installation methods: Requirement Details
- Dependencies and system requirements are extracted from the codebase during preprocessing.
- The parsers handle most of the heavy lifting here.
- Setup instructions and usage guides are automatically created based on data extracted from the codebase.
- Development roadmap, contribution guidelines, license information, and community resources.
- A return button is also included for easy navigation.
- Instructions for contributing to the project, including resource links and a basic contribution guide.
- Graph of contributors is also included for open-source projects.
Python ≥3.10Core runtime Installation Method (choose one)
pipDefault Python package manager
Isolated environment installer
- pipx
uvHigh-performance package manager
dockerContainerized environment Supported Repository Platforms To generate a README file, provide the source repository.
ReadmeAI supports these platforms: Platform Details File System Local repository access GitHub Industry-standard hosting GitLab Full DevOps integration Bitbucket Atlassian ecosystem Supported LLM API Services ReadmeAI is model agnostic, with support for the following LLM API services: Provider Best For Details OpenAI General use Industry-leading models Anthropic Advanced tasks Claude language models Google Gemini Multimodal AI Latest Google technology Ollama Open source No API key needed Offline Mode Local operation No internet required Installation ReadmeAI is available on PyPI as readmeai and can be installed as follows:
PipInstall with pip (recommended for most users): ❯ pip install -U readmeai Pipx With pipx , readmeai will be installed in an isolated environment: ❯ pipx install readmeai
UvThe fastest way to install readmeai is with uv : ❯ uv tool install readmeai
DockerTo run readmeai in a containerized environment, pull the latest image from [Docker Hub][dockerhub-link]: ❯ docker pull zeroxeli/readme-ai:latest From source Click to build readmeai from source - Clone the repository: ❯ git clone https://github.
com/eli64s/readme-ai - Navigate to the project directory: ❯ cd readme-ai - Install dependencies: ❯ pip install -r setup/requirements.txt Alternatively, use the [setup script][setup-script] to install dependencies:
Bash- Run the setup script: ❯ bash setup/setup.sh Or, use poetry to build and install project dependencies: